1.0 Objective: To lay down the procedure for the Operation & Calibration of pH meter
2.0 Scope: This sop of ph meter shall be applicable to the Analytical Development Department in Pharmaceuticals
3.0 Reference: In-House
4.0 Responsibility: Executive/Officer- Analytical Development
5.0 Accountability: Manager-Analytical Development.
6.0 Procedure for pH meter, Make Lab India.:
6.1 Cleaning Procedure for pH Meter:
6.1.1 Clean the pH meter with a clean lint-free cloth.
6.1.2 Clean the electrode with purified water and soft tissue paper.
6.2 Storage / Care of pH Electrode:
6.2.1 For a fast response of the pH electrode during sample measurements, the electrode is to be soaked in a slightly acidic solution. Also, pH electrodes should always be stored in a moist condition of pH 4.01 buffer or saturated KCL between routine measurements.
6.2.2 Never store an electrode in distilled water or de-ionized water as this causes migration of the ions from the electrode, thus decreasing the response.
6.3 Operating Procedure for pH meter:
6.3.1 Switch “ON” the main plug, 0.00 is displayed.
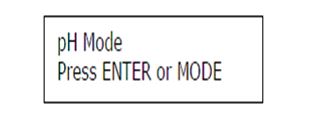
6.3.2 After the Meter is powered ON, only two keys are active, i.e. RESET and MODE. RESET key is used to initialize the Meter. By pressing the RESET key Meter gives a Beep and the Display reads like this-

6.3.2.1 Mode key is an important key, as it allows the user to select the Operating and Measurement Mode. Select pH mode by pressing the MODE key and after that press ENTER for confirmation of selection.

6.4 pH Measurement:
6.4.1 Before starting the pH measurement, Ensure the Instrument is set up properly.
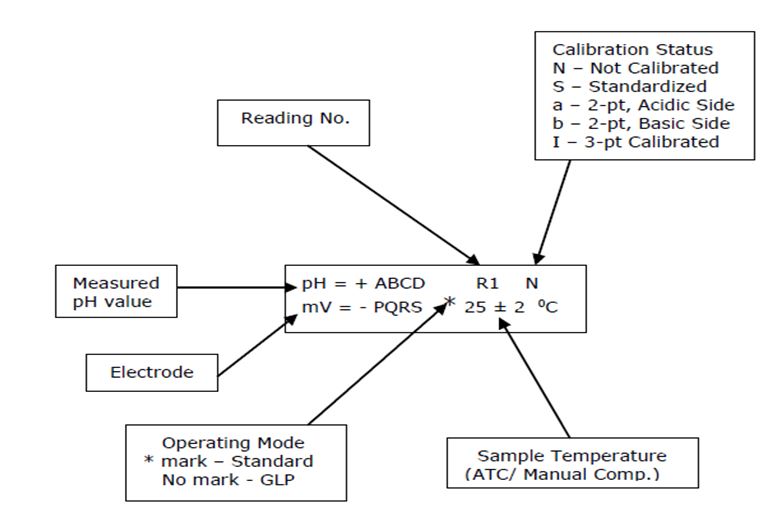
The Instrument Display reads like this-

6.4.2 “Wait stabilizing” – indicates, the instrument is checking Electrode signal Stability and once the signal is steady it shows the measured pH, mV, and temperature.

6.4.3 Before performing the pH measurement, select the Temperature Compensation type by pressing the “FWD/TEMPO” Key. Standardize & Calibrate the Instrument and pH Electrode by pressing the “CAL” key.
6.4.4 Selecting Temperature Compensation: TEMPCO: There are two options ‘Auto’ and ‘Manual’ for temperature selection at which the automatic temperature compensation is to be considered during Calibration & Measurement.
6.5 Calibration of pH Meter-
6.5.1 Preparation of Buffer Solutions:
6.5.2 The readymade / prepared buffer/tablets or capsule solutions shall be used for pH Calibration.
6.5.3 Potassium Tetra oxalate (pH – 1.68 at 25°C): Dissolve 1.271 gm of Potassium Tetra Oxalate in carbon dioxide-free water to make 100 ml.
6.5.4 Potassium hydrogen phthalate (pH- 4.01 at 25°C): Dissolve 1.021 gm of Potassium hydrogen phthalate previously dried at 110°C for one hour, in water to make 100 ml.
6.5.5 Potassium dihydrogen phosphate & Sodium Hydroxide (pH- 6.87 at 25°C): A Mixture containing 0.348 gm of Potassium dihydrogen phosphate and 0.355 gm of anhydrous disodium hydrogen phosphate both previously dried at 10° to 130°C for 2 hours. in carbon dioxide-free water to make 100 ml.
6.5.6 Sodium Tetra Borate (pH – 9.18 at 25°C): Dissolve 0.3814 gm of Sodium tetra borate in carbon dioxide-free water to make 100 ml.
6.5.7 Preparation of Saturated solution of Calcium hydroxide at 25°C (pH 12.45). Shake an excess of calcium hydroxide with water and decant at 25°C before use. Protect the solution from the absorption of carbon dioxide.
Note: For readymade buffer solutions. Dispense the buffer solution in a glass beaker and use it for 15 days for daily calibration. Readymade buffers can be used for one year from the opening date.
6.6. Calibration Procedure: (5-point calibration of pH meter)-
6.6.1 Select Calibration Mode by pressing the ‘CAL’ key.
6.6.2 Enter a password.
6.6.3 Enter ‘1’ to select the linear regression interpolation method as standard from the Calibration method.
6.6.4 Enter 1st Buffer value as 1.68 and press enter.
6.6.5 Dip the Electrode and temperature probe (RTD Sensor) in a 1.68 pH solution.
6.6.6 ‘Wait! Stabilizing’ message will be displayed. After stable reading press enter.
6.6.7 Remove the electrode from the 1.68 pH solution and rinse it thoroughly with purified water.
6.6.8 Soak the excess water with tissue paper.
6.6.9 Insert the pH electrode & RTD Sensor in a beaker having 4.01 pH solutions.
6.6.10 Repeat the same for 4.01, 6.86, 9.18, and 12.45.
6.6.11 Record the daily calibration of the pH meter in the format.
6.6.12 After completion of 5 point buffer, the instrument checks the slope of the electrode.
6.6.13 If the pH meter slope lies within the limit the final report with the value of the buffer used and the slope obtained.
6.6.14 Acceptance Criteria:
Limit of Slope: 90% – 105%
Tolerance: ±0.05 of Standard pH Buffer.
7.0 Frequency: Daily.
8.0 Precautions:
8.0.1 Clean and dry glass beakers for all sample measurements.
8.0.2 pH electrodes should always be stored in a moist condition in pH 4.01 buffer or saturated KCL solution.
8.0.3 Do not transfer the left-out solution of the buffer into the original container after calibration.
9.0 ABBREVIATIONS:
SOP: Standard Operating Procedure
AD: Analytical Development.
TEMP: Temperature
CHE: Chemical
EQ: Equipment
KCL: Potassium chloride
mV: Milli volt
CAL: Calibration
pH: the potential of hydrogen
7.0 ANNEXURE:
7.1 ANNEXURE-I: Buffer Status Label.
7.2 ANNEXURE-II: Daily Calibration Record of pH meter.
7.3 ANNEXURE-III: Logbook of pH meter
Note: ph meter sop pdf and annexure will be added soon.

Naresh Bhakar is the Founder and Author at Pharmaguddu.com, bringing his extensive expertise in the field of pharmaceuticals to readers worldwide. He has experience in Pharma manufacturing and has worked with top Pharmaceuticals. He has rich knowledge and provides valuable insights and data through his articles and content on Pharmaguddu.com. For further inquiries or collaborations, please don’t hesitate to reach out via email at [email protected].
