1.0 Purpose: To lay down the procedure for the operation of the particle counter
2.0 Aim: This Standard Operating Procedure is applicable to the operation on the Production floor.
3.0 Responsibility:
3.1 Line coordinators shall execute the process.
3.2 Officer / Sr. Officer shall check & control the activity.
3.3 Production Head shall be responsible for the execution of SOP.
3.4 Head of QA/designee shall be responsible for assuring compliance with the SOP.
4.0 Safety considerations:
4.1 Always charge the full battery before using the particle counter.
4.2 Always keep the equipment on a flat surface
4.3 Never run the equipment in unclassified areas.
4.4 Purge particle counter with zero count filter twice every day before start and after finishing.
4.5 Always use a dust cap to close the optics path after the monitoring is over or when the particle counter is not in use or in storage.
4.6 Always cover USB, RS 232, Ethernet, Alarm, and external exhaust ports with a dust cap.
4.7 Always use hand fingers to use the touch screen to prevent damage and scratch.
Related: SOP for non-viable particle counter
5.0 Procedure:
5.1 Switching ON :
5.1.1 Power ‘ON’ the particle counter by pressing the POWER button on the front panel. Press POWER to turn ON the unit
5.1.2 The instrument status screen displays the following:
Last Calibration Date :
Next Calibration Date :
Serial Number :
Firmware Version :
5.1.3 After a few seconds the Main screen appears
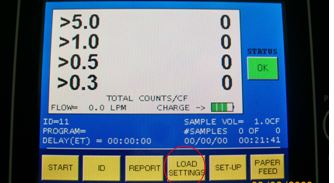
5.2 Selection of Location ID :
5.2.1 Press ID from the main screen to select a location ID to be monitored.
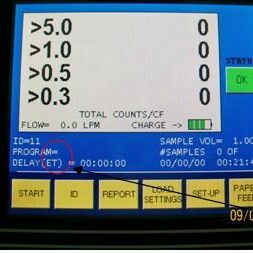
5.2.2 List of location IDs appears.
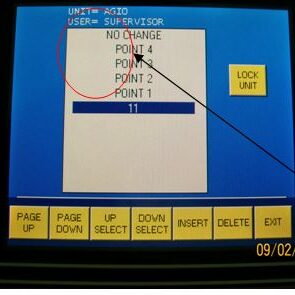
5.2.3 Press [UP SELECT] or [DOWN SELECT] to select the location to be monitored.
5.2.4 After selecting the location press EXIT.
5.3 Program selection for particle measurement :
5.3.1 Press the Load setting to select a clean area-specific program for particle measurement.
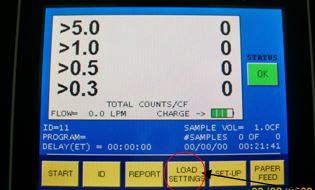
5.3.2 List of programs appears.
5.3.3 Press [UP SELECT] or [DOWN SELECT] to select the specific program for particle measurement.
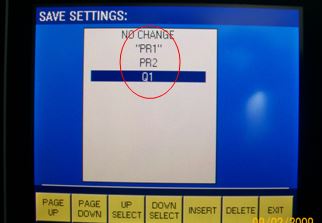
5.3.4 After selection, press EXIT.
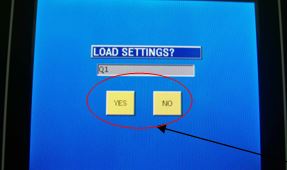
5.3.5 Option of YES or NO appears. Press YES to continue or NO to return to the list.
5.3.6 Selected program gets loaded by pressing YES.
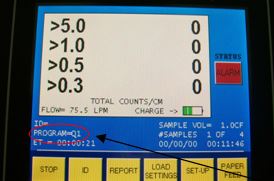
5.4 Remove the dust protection cap and hold the air sampling probe in the selected location to be monitored.
5.5 Press START to start the particle measurement.
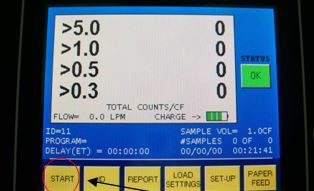
5.6 Particle counter prints sample automatically after every measurement.
5.7 Time taken for a sampling of one cubic feet air is 22 seconds.
5.8 Move to the next location for the next measurement and repeat steps from 5.2 to 5.5.
6.0 Abbreviations:
PR: Production
No. : Number
QA: Quality Assurance
Rev.: Revision
SOP: Standard Operating Procedure

Naresh Bhakar is the Founder and Author at Pharmaguddu.com, bringing his extensive expertise in the field of pharmaceuticals to readers worldwide. He has experience in Pharma manufacturing and has worked with top Pharmaceuticals. He has rich knowledge and provides valuable insights and data through his articles and content on Pharmaguddu.com. For further inquiries or collaborations, please don’t hesitate to reach out via email at [email protected].
