
SOP for Colony Counter is an essential step towards maintaining the Functioning and integrity of instruments used in the Pharmaceutical microbiology section.
1.0 Objective: To establish a written procedure for the operation and calibration of the Colony Counter.
2.0 Scope: This SOP covers the process of operating and calibrating the Colony Counter.
3.0 Responsibility: Microbiologist: Responsible for operating, calibrating, and maintaining the instrument. Must maintain proper records.
QA Officer/QAM: Responsible for reviewing records and heading the document.
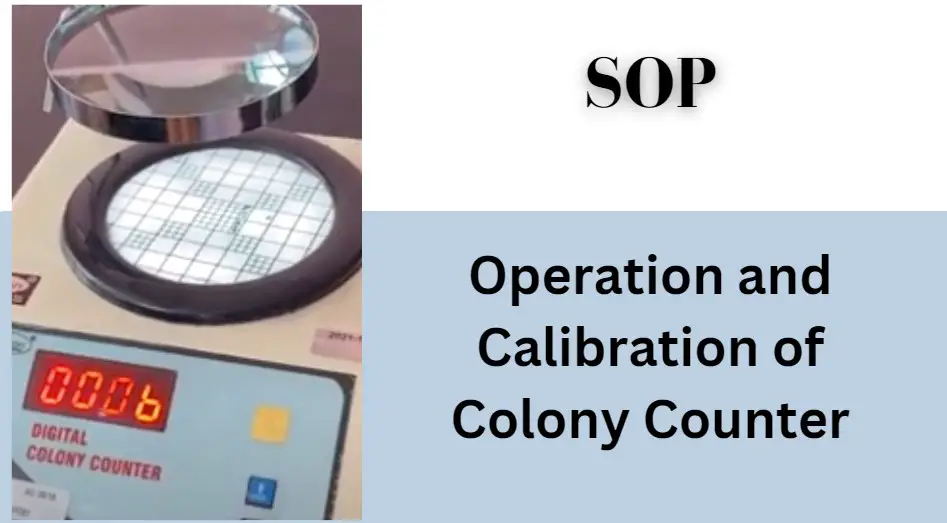
4.0 Procedure for Operation and Calibration of Colony Counter:
4.1 Preparation:
Ensure the instrument is visibly clean and free from dust.
4.2 Switching On:
Turn ON the mains power.
Press the reset On/Off Switch to turn ON the instrument. The display will show some numbers.
4.3 Resetting Counter: Press the reset switch to reset the counter to 0000.
4.4 Place the Petri plate on the graduated Woulffhneugal glass plate on top of the instrument.
4.5 Position the magnifying lens for clear visibility of the Petri plate. Leave a sufficient margin between the lens and the plate for convenient marker usage during counting.
4.6 Remove the Auto-mark cap and touch the probe’s marking point to a Bacteriological Colony on the Petri Dish.
4.7 Press the probe gently. The counter will register a count, beep, and mark an ink dot on the Petri Dish.
Continue until all colonies are counted.
4.8 As colonies are marked, double counting is avoided. Note the counter reading when counting is complete.
4.9 The COUNT push button switch (next to the RESET switch) can be used for sparse plate counting or other purposes.
4.10 To avoid marking on the Petri plate, count in the following methods:
a. If the plate is thin, count on the bottom side while it’s kept upside down.
b. Place the lid over the plate and count on the glass cover. Count without altering the view angle.
Related SOP: Depyrogenation method and washing of Test tubes for BET
5.0 Refilling Ink Cartridge (Auto-mark):
5.1 Unscrew the Auto-mark body and remove the cartridge.
5.2 Open the cap at the back of the cartridge.
5.3 Add about five drops of ink, then reassemble the cartridge.
5.4 Tighten the Auto-mark body to ensure a gentle probe push registers a count.
6.0 Calibration:
6.1 Procedure:
6.1.1 Operate the instrument following the above procedure.
6.1.2 Compare electronic and manual counts using the COUNT switch.
6.2 Record Calibration:
6.2.1 Record calibration results in the format provided in Annexure – 1.
7.0 Maintenance:
7.1 Cleaning: Clean the instrument with a dry cloth.
7.2 Magnifying Glass: Clean the magnifying glass with tissue paper.
8.0 Annexures:
Annexure – 1: Record Format for Colony Counter Calibration
Annexure – 2: Usage Log Book for Colony Counter
Related SOP: Procedure for Growth Promotion Test in Microbiology
Annexure – 1: Record Format for Colony Counter Calibration:
Calibration Date:
Next due Date:
Instrument ID:
Make:
Modal No.:
| Sr. No. | Counted Figure | Display Figure | Remark |
| Calibrated BY and Date: Checked By and Date: | |||
Annexure – 2: Usage Log Book for Colony Counter:
| Date | Name of Sample | A. R. No. | Batch No. | Used by | Remark |
-
by
-