GMP & Pharmaceutical Manufacturing Expert
✓ Reviewed by: Pankaj Sharma - Quality Control Specialist
Reviewed for Quality Control accuracy, laboratory practices, analytical methods, and technical relevance
📅 Last Updated: July 8, 2023
In the pharmaceutical industry, ensuring the quality and integrity of sieves/Screens used in the manufacturing process is very important. Sieves are widely used to get desired particles size. To assess the integrity of sieves accurately, a specialized kit is used. This kit consists of various tools and procedures designed specifically for sieve inspection. In this article, we will explore the components and usage of the kit used to check sieve integrity/ Sieve Calibration in pharmaceuticals.
Sieve Calibration Methods
Procedure for Checking Integrity and Mesh Size of Sieve/Screen
- Switch on the mains of the sieve Inspection kit and switch off the lights d the room area.
- Put the sieve in the scot provided in the sieve inspection kit Check the sieve visually against the illumination of the sieve inspection kit or against the light for any damages or crevices on the joints/rim of argon welding and check the condition of silicon molding.
Checking Mesh size using Densometer:
- To check mesh size above 40# and up to 150#: Hold the sieve against the light on sieve inspection board.
- Take the appropriate scale of Denso meter.
- Hold the Denso meter over a sieve. Check for the parabola on the scale and mark out the peak of parabola 1, which will indicate the mash on a scale.
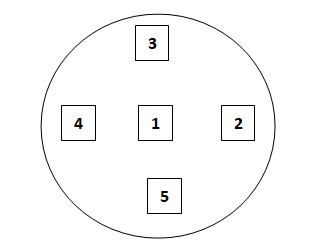
- Check with Denso meter at five different positions.
Checking Mesh size using Linear inch scale
- It is used for sieve sizes up to 40#.
- Keep the magnifying lens on sieve surface after setting the lens in a proper manner to read the number of holes per linear inch.
- Count the number of openings per linear inch with the help of a pointed needle, which indicates the mesh size. For example: For 40# The number of openings shall be present 40 in one linear inch. Check the sieve at 5 different places to confirm the exact mesh size of the sieve.
Checking Mesh size using Combined Eye Glass reflex type:
- It is also called Pocket microscope using 30X
- It is used sieve sizes from 4# to 40#.
- Keep the magnifying lens on sieve surface after folding the lens in a proper manner to read the number of holes per linear inch.
- Count the number of openings per linear inch with the help of a pointed needle which indicates the mesh size. For example, For 20# mesh, The number of openings shall be present 20 in one linear inch.
- Check the sieve at 5 different places, as below figure to confirm the exact mesh size of the sieve.
Checking Mesh size using illuminated Scale Magnifier (Lumagny)
- It is used for mesh size from 4# to 40#
- Keep the sieve on a non-reflecting plain surface.
- Place the illuminate scale magnifier on sieve.
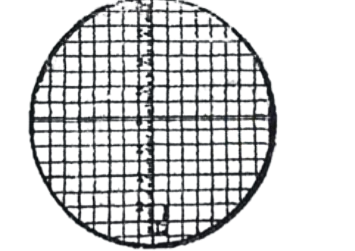
- Adjust the focus of magnifier with the help of an 8X focusing ring. The magnifier contains the scale as shown in figure below. Match the scale of illuminated magnifier with aperture of sieve as shown in Figure below.
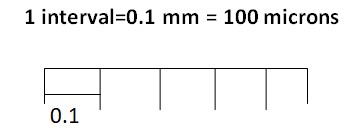
- 1 interval = 0.1 mm = 100 microns as shown below.
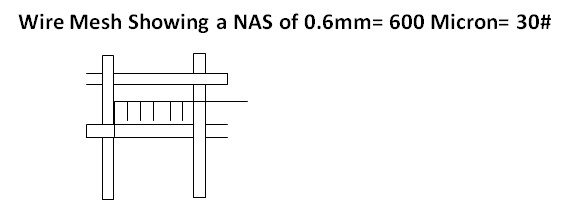
- The nominal aperture size (NAS) and wire diameter shall be checked in sieve as shown in Figure below.

- Count the total lines of scale covered by the aperture i.e. the lines of scale covered by distance between the adjacent parallel wires.
- The distance between adjacent parallel wires shall be measured in both vertical and horizontal positions.
- Mesh size in microns shall be calculated as follows:
- Mesh in Micron size = Lines of scale covered between the adjacent parallel wires x 100.
- For example: If lines of scale covered between the adjacent parallel wires is 6 (as shown in Figure above) x 100 = 600 micron. 600 micron 30 mesh ASTM 11 to 70.
- Take 5 such readings all over the sieve. Calculate the average of 5 readings and it shall be regarded as the mesh size in microns.
- Compare the calculated micron size with standard chart.
- If it falls within the specified tolerance, the sieve shall be accepted.
Related: SOP on Management of Sieves
Using Pen Microscope (50x Magnification):
For sieve sizes above 100# upto 500#
- Keep the sieve on non-reflecting plain surface.
- Place the pen microscope on sieve.
- The magnifier contains the scale. Match the scale of pen microscope with the aperture of sieve as shown in the figure below. 1 interval =0.02 mm= 20 microns as shown. The nominal aperture size (NAS) and wire diameter can be checked in sieve as in shown Figure above.
- Count the total lines of the scale covered by the aperture i.e. the lines of scale covered by distance between the adjacent parallel wires.
- The distance between adjacent parallel wires shall be measured in both vertical and horizontal positions.
- Mesh size in microns shall be calculated as follows: for example Mesh in Micron size = Lines of scale covered between the adjacent parallel wires 4 x 20 = 80 microns.
- 80 micron 200 mesh ASTM from 11 to 70.
- Take 5 such readings from all over the sieve.
Using Pin Gauges- GO, NO, GO
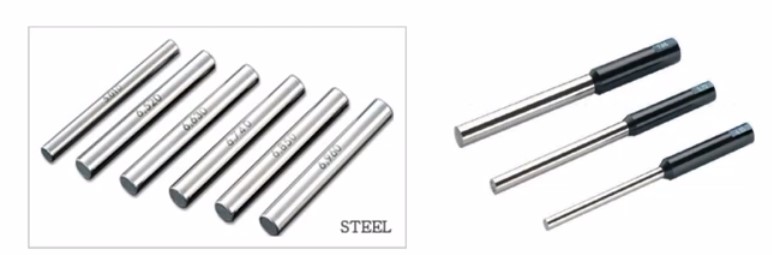
Lastly, let’s discuss the Pin Gauge, which consists of precisely cut cylindrical bars in various sizes. This tool serves the primary purpose of measuring and inspecting the diameter of small holes. Additionally, it can be used as a test bar for measuring geometric deviations.

Naresh Bhakar is the Founder and Author at Pharmaguddu.com, bringing his extensive expertise in the field of pharmaceuticals to readers worldwide. He has experience in Pharma manufacturing and has worked with top Pharmaceuticals. He has rich knowledge and provides valuable insights and data through his articles and content on Pharmaguddu.com. For further inquiries or collaborations, please don’t hesitate to reach out via email at [email protected].