GMP & Pharmaceutical Manufacturing Expert
✓ Reviewed by: Pankaj Sharma - Quality Control Specialist
Reviewed for Quality Control accuracy, laboratory practices, analytical methods, and technical relevance
📅 Last Updated: April 30, 2026
1.0 OBJECTIVE: To lay down the procedure for the Cleaning and Operation of leak test apparatus for filled bottles in Pharmaceutical lab.
2.0 SCOPE: This procedure is applicable to cleaning and operation of leak test apparatus, which is used for Leak test of filled bottles in liquid department at Pharmaceuticals.
3.0 RESPONSIBILITY
Operator, Officer – Production Department
Manager- Production Department
4.0 DEFINITION(S)
NA
Similar SOP: SOP for Carton 2D Barcode Printing Machine
5.0 PROCEDURE:
5.1 Cleaning
5.1.1 Carry out the following procedure after every test
5.1.2 Ensure the instrument is switched off.
5.1.3 Remove the vacuum connection to desiccator.
5.1.4 Remove the clear top lid of the leak test apparatus.
5.1.5 Remove the bottles from the perforated disc and put them in NRR container.
5.1.6 Remove the blotting paper from perforated disc and carry out the mopping with lint free cloth. If there are any stains use wet lint-free cloth.
5.1.7 Dry it with a cleaned dry cloth.
5.1.8 Fix the gasket and assemble the desiccators & lid, and connect the vacuum connection.
5.1.9 Record the cleaning detail in Annexure- I (leak test apparatus cleaning record).
5.2 Set up and Operation
5.2.1 Vacuum and Time Set Up
5.2.2 Ensure the cleanliness of leak test apparatus.
5.2.3 After line clearance from QA, put the “UNDER PROCESS” label dully filled and signed on the machine.
5.2.4 Switch on the main power supply of the instrument.
5.2.5 Switch ‘ON’ of the instrument.
5.2.6 Set the vacuum up to 300 mm Hg.
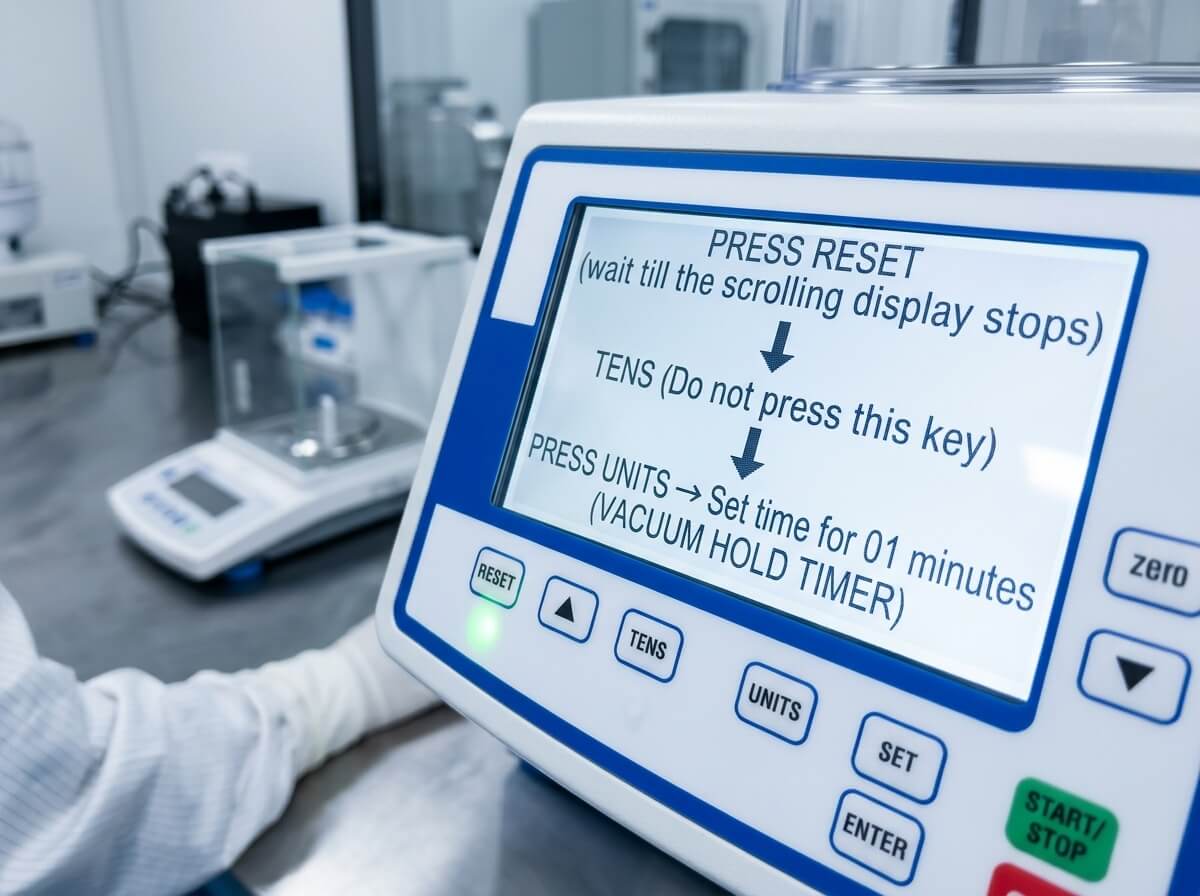
5.2.7 After setting the vacuum, further set the hold time for 01 minutes as per following procedure:

5.2.8 Checking the bottles for leakage
5.2.8.1 Collect the sealed bottles from each sealing head of bottle sealing machine as per frequency mentioned in respective Batch Packing Record (BPR).
5.2.8.2 Identify each head by putting number on each sealed bottle with marker.
5.2.8.3 Put blotting paper to cover perforated disc of desiccators, and place each bottle in inverted position on blotting paper.
5.2.8.4 Insert lid on bowl and close the red colored three ways key.
5.2.8.5 Open three ways key and apply vacuum by pressing the START key.
5.2.8.6 The vacuum pump will start and watch the vacuum building up on display.
5.2.8.7 Once the “Set Vacuum” is reached, the pump will stop, and the timer will start (Hold time).
5.2.8.8 When the timer comes to ‘Zero’, vacuum releases automatically. Open the bowl, remove the bottles one by one from bowl, and check the blotting paper for presence of stains.
5.2.8.9 If no stains are observed on blotting paper, bottles are leak-proof and sealing is satisfactory.
5.2.8.10 If leakage is observed from any one head, rectify of particular head or heads. If leakage is not observed, continue filling.
5.2.8.11 Record the same in the respective BPR.
5.2.8.12 Leak test to be performed at the start of batch and after every two hour of the batch run alternatively by production and QA.
5.3 Precaution
5.3.1 Ensure that there is adequate lighting while carrying out the leak test.
6.0 ABBREVIATION(S):
SOP: Standard Operating Procedure
No. : Number
Q.A.: Quality Assurance
BPR: Batch Packing Record
mg: Milligram
ml: Milliliter
Hg: Mercury
Mm: Millimeter
NRR: Non-recoverable rejection
7.0 REFERENCE(S)
NA
8.0 ANNEXURE(S)
Annexure –I: Leak test apparatus cleaning record.
| S. No. | Date | Time | Product Name | B. No. | Operation Done By | Remarks |
|---|---|---|---|---|---|---|
| 1 | ||||||
| 2 | ||||||
| 3 | ||||||
| 4 | ||||||
| 5 | ||||||
| 6 |
9.0 DISTRIBUTION
9.1 Master copy: Quality Assurance
9.2 Controlled copy ( s): Production department
9.3 Reference copy (s): Production department

Naresh Bhakar is the Founder and Author at Pharmaguddu.com, bringing his extensive expertise in the field of pharmaceuticals to readers worldwide. He has experience in Pharma manufacturing and has worked with top Pharmaceuticals. He has rich knowledge and provides valuable insights and data through his articles and content on Pharmaguddu.com. For further inquiries or collaborations, please don’t hesitate to reach out via email at [email protected].