1.0 Objective: To lay down a procedure for operation calibration and cleaning of IR Moisture Balance.
2.0 Scope: This procedure is applicable to operation calibration and cleaning of IR Moisture Balance in the production department.
3.0 Responsibility:
Operator, Officer, and Executive – Production Department
Manager – Production Department
4.0 Definitions:
NA
5.0 Procedure for IR Moisture Balance :
5.1 Setting:
5.1.1 Adjust the air bubble in the circle by using leveling feet.
5.1.2 Switch “ON” the main power supply. Balance displays ‘OFF’.
5.1.3 Press the ‘I/O’ key to “ON/OFF” the balance. The balance will turn ‘ON’
5.1.4 Balance will perform a self-test and display the opening screen.
5.1.5 Press the ‘Prog’ key. The program’s main screen will open. Press the UP/DOWN key to select the program.
5.1.6 Press the ‘>’ key. Program 2 screen will open and it will display
– Program Name
– Heating Program
– Standby Temperature
– Bar Graph for Weighing-in Sample
– Start Analysis
– End of Analysis
– Weight Resolution for Analysis
– Display Mode
– Print Intermediate Results
– Analysis ID with Auto Numbering
– Analysis W/Former Spl (100 % fot.)
– Identification
– Factory Settings
5.1.7 Select the desired function by pressing the ‘UP/DOWN’ key. After reaching the desired function press the ‘>’ key.
5.2 Heating Program Setting:
5.2.1.1 Select ‘Heating Program’ and press the ‘>’ key. The next screen will display various drying options.
5.2.2 Select the desired drying option by pressing the ‘UP/DOWN’ key. After reaching the desired drying option press the ‘>’ key.
5.2.2.1 Change the drying temperature and time as per specifications in the respective BMR and press the ‘ENTER’ arrow key for confirmation.
5.2.2.2 Press ‘<<’ key. The program’s main screen will open.
5.2.2.3 Press ‘<<’ key. The opening screen will open.
5.3 Operation:
5.3.1 Ensure cleanliness of the instrument and calibration status before operation.
5.3.2 Press the ‘↑↓’ arrow key to select the TARE function and zeroes the weight by pressing the ‘TARE’ key. Load sample message will be displayed on the screen.
5.3.3 Press the ‘↑↓’ arrow key. The safety cover over the weighing platform will slide inside.
5.3.4 Load the powder sample (approximately 2 g), evenly distributed on the weighing plate.
5.3.5 Press the ‘↑↓’ arrow key. The safety cover over the weighing platform will slide out. ‘Start Analysis’ message will display on the screen.
5.3.6 Press the ‘START’ key. The analysis will start and the ‘Begin’ message will display on the screen.
5.3.7 ‘Analysis End’ message will display on completion of analysis.
5.3.8 Press the ‘↑↓’ arrow key. The safety cover over the weighing platform will slide inside.
5.3.9 Remove the sample plate and empty it in the SS container labeled as ‘Rejection’.
NOTE: Before analysis of the powder sample observe the moisture content of some paper pieces to avoid the interference of moisture present in the drying chamber.
5.4 Calibration:
5.4.1 Turn ‘OFF’ the IR moisture balance. Turn ‘ON’ the IR moisture balance.
5.4.2 Press the ‘↑↓’ arrow key. The safety cover over the weighing platform will slide inside.
5.4.3 Press the ‘TARE’ key. The balance will display 0.000 g.
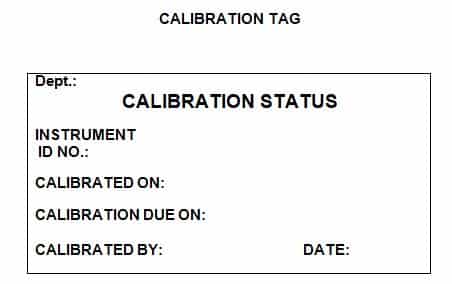
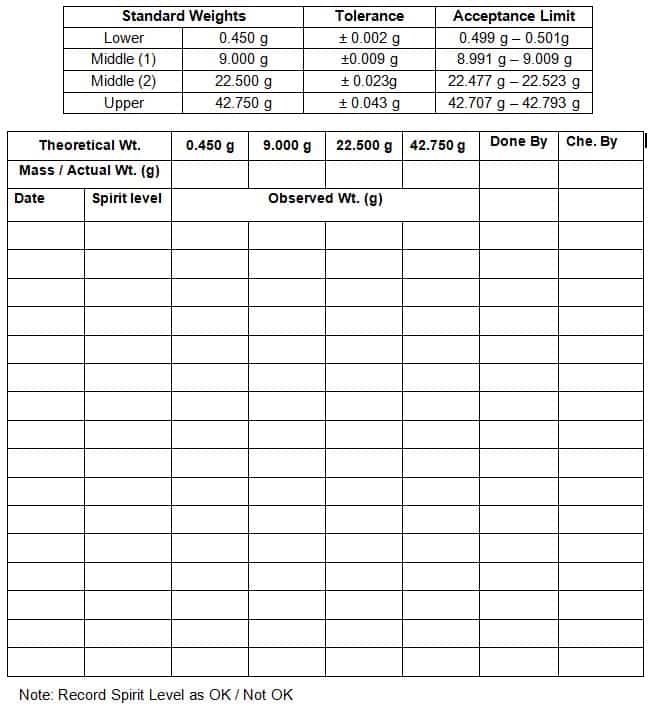
5.4.4 Place standard weights one by one in the center of the sample plate as per the table given below and record the observations in the annexure-I and calibration tag as per annexure-II
Balance Capacity Operating Range Standard Weights to be used for calibration

5.4.5 A balance is considered satisfactory for use if the readings are found to be within the acceptable limit of the balance.
5.4.6 If the readings are exceeding the acceptable limit, put an ‘UNDER MAINTENANCE’ tag, and inform the head of the department. Inform the Engineering Department of necessary action and record the same in Balance Calibration Record.
5.4.7 Do not use a balance till the problem is rectified.
5.4.8 After rectification, re-calibrate the balance before use and enter the same in IR Moisture Balance Annexure–I.
5.4.9 Check for the zero error as per the specific operation procedure of the balance and enter the reading in the respective annexure for the balance.
5.4.10 Use the Standard weights duly certified by the Weights and Measures Department.
NOTE: 1.) Ensure zero reading before placing any standard weight for calibration.
2.) Reading observed on balance should not vary more than 0.1 % of the standard weight used for calibration. In case, if 0.1 % tolerance is not practically readable on balance, the least count X 2 of that particular balance shall be considered as the tolerance limit for the respective standard weight or nearest possible readable weight w. r. t. 0.1 % tolerance shall be considered as tolerance for respective standard weight.
5.4.11 Frequency: Once Daily.
5.5 Cleaning for IR Moisture Balance:
5.5.1 Remove the sampling plate stand and SS plate.
5.5.2 Clean the IR moisture balance body and dismantled parts with a clean dry lint-free cloth or tissue paper.
5.5.3 Wipe the dismantled parts with IPA once a week.
5.5.4 Frequency: Once daily or whenever looking grimy.
Sampling plate: Before and after use
Related SOP: Daily Verification of Weighting balance
6.0 Abbreviations:
g: Grams
w. r. t. : With Respect To


Naresh Bhakar is the Founder and Author at Pharmaguddu.com, bringing his extensive expertise in the field of pharmaceuticals to readers worldwide. He has experience in Pharma manufacturing and has worked with top Pharmaceuticals. He has rich knowledge and provides valuable insights and data through his articles and content on Pharmaguddu.com. For further inquiries or collaborations, please don’t hesitate to reach out via email at [email protected].
