
GMP & Pharmaceutical Manufacturing Expert
✓ Reviewed by: Pankaj Sharma - Quality Control Specialist
Reviewed for Quality Control accuracy, laboratory practices, analytical methods, and technical relevance
📅 Last Updated: July 21, 2026
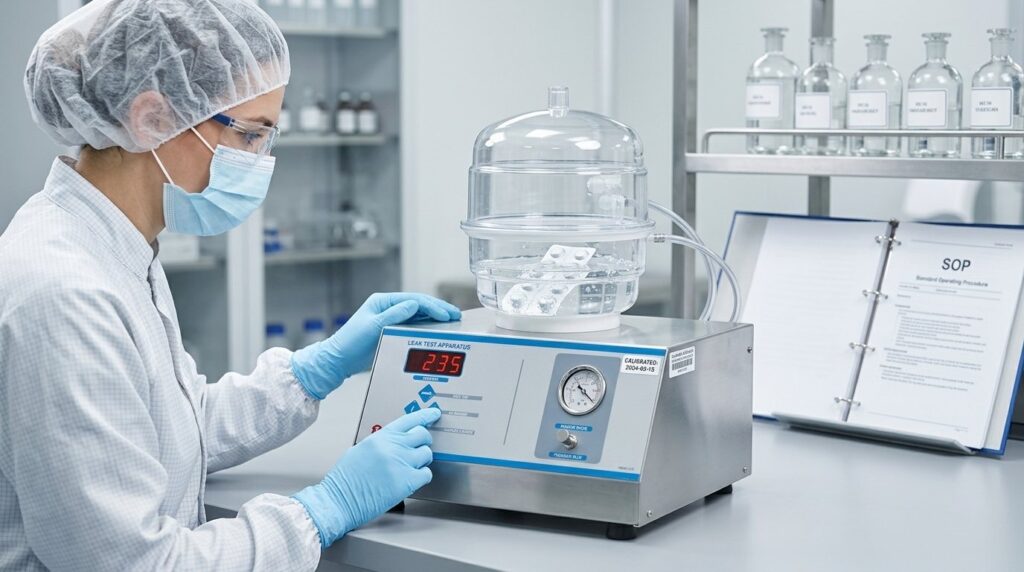
Learn about Standard operating procedures on Leak Test Apparatus, including Purpose, Scope, Responsibility, Procedure, how to perform Leak test for blisters and containers and aluminum triplex, limits, Action on Failure of leak test for blisters or strips, Frequency, Challenge test, Cleaning and calibration of leak test apparatus.
1.0 Purpose: To lay down the standard operating procedures for the operation, cleaning, and calibration of the Leak test apparatus.
2.0 Scope: This standard operating procedure is applicable for the operation, cleaning, and calibration of leak test Apparatus in IPQC area at the Pharmaceutical Plant.
3.0 Responsibility: 3.1 The production officer or officer is responsible for the operation, cleaning, and calibration of the leak test apparatus.
3.2 Head Quality Assurance and Head Production are responsible for ensuring compliance with the standard operating procedure.
3.3 The engineering officer is responsible for the calibration of leak test apparatus operators for vacuum gauge and timer.
4.0 Pre-operation checks:
- Check that the leak test apparatus is calibrated.
- Ensure that no blisters or strips from previous test checks are lying in the leak test operators.
- Check the blister or strip taken for a leak test for any physical damage before performing the test.
- Check that the methylene blue solution is prepared.
5.0 Procedure:
5.1 Preparation of Methylene blue solution:
- Remove the lead and disc placed inside the desiccator. Take soft water in the desiccator up to the level of the disc.
- Add 0.5 % v/v solution of methylene blue indicator, for example, 20 ml in 4000 ml water.
- This solution shall be changed every working day.
5.2 Procedure for performing leak test for strip and blister:
- Collect the blister/strips from the strip/blister machine such that all pockets of the Counter selling roller for sealing roller are covered.
- Place the blister or strips inside the leak test apparatus, immersed in methylene blue solution with the help of the disc provided with the Leak test apparatus.
- Place the lid properly using a rubber gasket and ensure that it is sealed.
- Switch on the main power supply to the leak test apparatus — the LCD screen will show 000 mm Hg and the time will show 00:00. You can set your vacuum level and time by pressing the set vacuum and time key.
- Press the start key given on leak test apparatus, the LED light will be “ON” and the LCD screen show the releasing vacuum and time 00:00 minutes.
- The vacuum pump of the leak test Apparatus will start, and the LCD screen will show the increase in vacuum pressure when the vacuum reaches up to level; then the vacuum pump stops automatically, and the LCD screen shows vacuum 280±10 mm Hg and hold time 02:00 minutes to 00:00, and LCD screen shows releasing vacuum and time 01:00 minutes 00:00 minutes, and a red light will stop.
- Open the Apparatus lid and take out blisters or strips from the solution.
- After removing the blister and strip, wipe them to dry individually with the help of a lint-free Duster.
- Open each blister and strip and check tablets visually for any damage due to leakage for Spot with methylene blue indicator color.
- After completion of the leak test, discard the packaging material in the waste Bin and transfer the tablets to a container bearing the label “Container waste for Disposal“. At the end of the shift, transfer the product waste container to the washroom.
- Tablets failing in the test should not be packed.
5.3 Permissible limits:
No Stain of methylene blue solution should be observed on the Tablet, or none of the tablets subjected to the leak test should show a wet surface.
5.4 Action on Failure of leak test for blister or strips:
- Stop the machine immediately and inform to Department Head.
- Quarantine the blister packed during the interval between the last satisfactory leak test and failure of the leak test.
- Inform to QA department by raising the deviation as per SOP.
- Handle the quarantine-packed finished goods as per the process mentioned in the deviation.
5.5 The leak test procedure for the containers and aluminum triplex:
- Take one cleaned container, and seal the container of the induction cap sealer machine as per SOP “Setting, operation, and cleaning of induction cap sealing machine” Cross-mark the sealed container with a permanent pen marker and put the sealed container in a polyethylene bag.
- Remove the cap of the container and place the container without a cap inside the leak test desiccator and place the proposed disc plate above the container.
- Put the load on a perforated disc plate with a perforated metal disc so that container remains dipped in solution.
- Close the lid of the desiccator properly by adjusting the alignment of the rubber gasket and ensuring that it is sealed.
- Place the lid properly using a rubber gasket and ensure that it is sealed.
- Switch on the main power supply to leak test Apparatus then the LCD screen shows 000 mm Hg and time shows 00.00 and time can be set by pressing the key of set vacuum and time.
- Follow the above process to start the Apparatus.
- Open the lid of the Apparatus and take out the containers/ aluminum triplex eliminated polybag from the solution.
- After removing the containers/ aluminum triplex/ laminated polybags wipe them to dry, usually with the help of a lint-free Duster.
- Open the containers/ aluminum triplex laminated poly bag and check tablets visually for damage due to leakage or spotting with methylene blue indicator color.
- After the leak test of the containers/ aluminum triplex, laminated polybag, discard the packaging material in the waste Bin and transfer the tablet to a container bearing the label “Container waste for Disposal.” at the end of the Shift.
- Transfer the product waste container to the washroom and dispose of them as per “Product waste; Collection and disposal” SOP.
5.6 Frequency :
Leak test for aluminum triplex laminated polybag will be done jointly by production and quality assurance at the start of the batch, after any breakdown maintenance of the machine, and at the end of the batch.
5.7 Failures only test for the bulk pack :
Failure of the leak test will be handled by raising the deviation by production as per SOP ”Handling of Deviation“.
5.8 How to perform Challenge test for Leak test apparatus?
- Perform a challenge test for the leak test Apparatus after performing the first leak test every day or when you require it.
- Collect 5 blisters or strips randomly for the challenge test. In the case of container packing, take one empty bottle for a challenge test.
- Puncture the blister or strip at one end on a pocket with a wire and mark the same with a permanent Marker Pen.
- In the case of a container, packing removes the cap of the bottle, puncture the seal of a bottle with the help of the wire, and mark the same with a permanent marker.
- Operate and perform the leak test by following the procedure defined in the above steps.
5.9 Permissible limit:
- Only puncture blister/ strip and the container should be failed in the leak test.
- If there is no penetration of dye solution in the puncture blister /strip container pocket, this indicates that there is no sufficient vacuum created inside the leak test apparatus.
5.10 Cleaning of leak test apparatus :
- Clean the leak test Apparatus externally after every test with a clean lint-free Duster.
- Discard the methylene blue solution in a container and transfer the container to the washing room.
- Dilute methylene blue solution with an ample amount of water and drain.
- Clean the leak test Apparatus desiccator along with the vacuum pump pipe with soft water after every working day.
5.11 Calibration of leak test apparatus:
- Calibration of leak test Apparatus for vacuum gauge will be done on a yearly basis, and for timer will be done on a half-yearly basis.
Related Post: Calibration of weighing balance
6.0 Abbreviation:
- SOP- Standard operating procedure
- IPQC- In-process quality control
- LCD -liquid crystal display
- Hg-Mercury
- mm-millimetre
Annexure (Log Book):
| Date | Instrument ID | Product | B. No. | Start Time | End Time | Checked by | Verified by |
|---|---|---|---|---|---|---|---|

Naresh Bhakar is the Founder and Author at Pharmaguddu.com, bringing his extensive expertise in the field of pharmaceuticals to readers worldwide. He has experience in Pharma manufacturing and has worked with top Pharmaceuticals. He has rich knowledge and provides valuable insights and data through his articles and content on Pharmaguddu.com. For further inquiries or collaborations, please don’t hesitate to reach out via email at [email protected].