GMP & Pharmaceutical Manufacturing Expert
✓ Reviewed by: Pankaj Sharma - Quality Control Specialist
Reviewed for Quality Control accuracy, laboratory practices, analytical methods, and technical relevance
📅 Last Updated: April 3, 2023
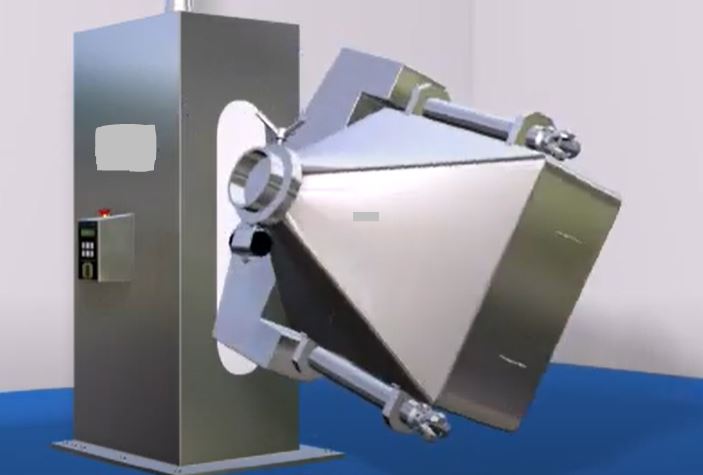
1.0 Objective: To lay down a procedure for the operation of Bin Blender.
2.0 Scope: This standard operating procedure Operation of Bin Blender is applicable to the Bin Blender located in the manufacturing area.
3.0 Responsibility: Officer, Executive – Production Department follow procedure while executing the operation
Manager – Production Department for overall compliance
4.0 Procedure for Operation of Bin Blender:
4.1 Ensure the ‘CLEANED’ label duly filled and signed is affixed on the equipment. Ensure cleanliness of equipment and area. Remove the ‘CLEANED’ label and affix it to the respective BMR. Affix the “UNDER PROCESS” label duly filled and signed on the equipment and record all the observations in the Equipment Usage Log Sheet as per “Making entry in Equipment Log Book” SOP.
4.2 Turn ‘ON’ the control ‘ON/OFF’ key. The opening screen shall appear within one minute with the date and time displaying on the top LHS and RHS corners respectively.
4.3 Touch ‘Login’ on the screen. Keypad will appear on screen. To open the digit keypad touch ‘0-9’. Load the correct password and then touch ‘Enter’ for confirmation.
Note: Three access levels have been provided in the machine.
Level 3 is meant for recipe editing.
Levels 2 and 1 are for machine operation in auto and manual modes.
4.4 Recipe Edition for Operation of Bin Blender:
4.4.1 Access level 3. Touch ‘Recipe Edit’ on the screen. ‘Recipe Edit – 1’ screen will appear with the following process parameters ‘Product Name, Batch No., Operator Name, Mfg. Date, Exp. Date, Batch size’.
4.4.2 Load the Product Name, Batch No., Mfg. Date, Exp. Date, Batch size as per respective BMR.
4.4.3 Touch ‘Recipe Edit’ on the screen. The ‘Recipe Edit – 2’ screen will appear with the following process parameters ‘Bunker Capacity, Pre-Lubrication Time, Blender RPM, Print Interval’.
4.4.4 Load the Bunker Capacity, Pre-Lubrication Time, and Print Interval as per respective BMR.
NOTE: Blender RPM is fixed.
4.4.5 Touch ‘Next’ on the screen. Loaded process parameters shall be displayed on the screen.
4.4.6 Touch ‘Recipe Save’ on the screen to save the recipe. Keypad will appear on screen. Give a suitable name to the recipe and then touch ‘Enter’. The previous screen will appear. To delete any of the already existing recipes touch ‘Recipe Delete’ on the screen. A stored recipe list will appear on screen. Select the recipe. Warning message ‘Delete Recipe’ will appear on screen. Touch ‘Yes’ to delete.
4.4.7 Touch ‘Exit’ on the screen. An opening screen will appear.
4.4.8 To select an already loaded recipe, touch Load recipe on the screen. A stored recipe list will appear on screen. Touch the recipe as per respective BMR the touch ‘Escape’. The selected stored recipe will be loaded.
4.5 Auto Mode Operation:
4.5.1 Touch ‘Auto mode’ on the opening screen with Operation details as ‘Pre-Lubrication Cycle’. Auto mode main screen will appear with the instruction ‘Unlock The Safety Railing And Open The Door’.
4.5.2 Touch ‘OFF’ to turn the ‘ON’ auto mode operational.
4.5.3 Unlock the safety railing and touch ‘OK. Instruction ‘Insert The Bunker’ will display on the screen.
4.5.4 Insert the bunker and lock it firmly. Touch ‘OK’. Instruction ‘Close The Door And Lock The Safety Railing’ will display on the screen.
4.5.5 Close the safety railing such that it will press the railing limit switch. Touch ‘OK’. Instruction ‘Lift the Bunker’ will display on the screen.
4.5.6 Touch ‘OK’. Blender bin will start lifting upward and stop automatically at the middle limit switch. Instruction ‘Unlock The Safety Railing And Remove The Trolley’ will display on the screen.
4.5.7 Unlock the safety railing and remove the trolley. Touch ‘OK’ on the screen. Instruction ‘Lock The Safety Railing’ will display on the screen.
4.5.8 Lock the safety railing. Touch ‘OK’. Instruction ‘Start The Cycle’ will display on the screen. Touch ‘OK’. Next screen will display the set and actual blending RPM and Time.
4.5.9 Touch ‘Start’ on the screen. Cycle will start as per set parameters and stops automatically after set blending time. Next screen will show operation details as ‘Pre-Lubrication Cycle Finished’ and instruction ‘Unlock The Safety Railing and Insert The Trolley’.
4.5.10 Unlock the railing and adjust the trolley below the lifted blender bin. Touch ‘OK’. Instruction ‘Adjust The Trolley And Lower The Bunker’ will display on the screen.
4.5.11 Touch and hold ‘Down’ on screen. The blender bin will start lifting down. Touch ‘Up’ key to lifting up the blender bin, if required.
4.5.12 Screen will display operation details ‘Lubrication Cycle’ and instruction ‘Unlock The Safety Railing And Open The Door’.
4.5.13 Unlock the safety railing and touch ‘OK. Instruction ‘Add The Lubricant’ will display on the screen.
4.5.14 Open the lid of the blender bin and add the lubricant with S.S. scoop and firmly close the lid. ‘OK. Instruction ‘Insert The Bunker’ will display on the screen.
4.5.15 Insert the bunker and lock it firmly. Touch ‘OK’. Instruction ‘Close The Door And Lock The Safety Railing’ will display on the screen.
4.5.16 Close the safety railing such that it will press the railing limit switch. Touch ‘OK’. Instruction ‘Lift the Bunker’ will display on the screen.
4.5.17 Touch ‘OK’. Blender bin will start lifting upward and stop automatically at the middle limit switch. Instruction ‘Unlock The Safety Railing And Remove The Trolley’ will display on the screen.
4.5.18 Unlock the safety railing and remove the trolley. Touch ‘OK’ on the screen. Instruction ‘Lock The Safety Railing’ will display on the screen.
4.5.19 Lock the safety railing. Touch ‘OK’. Instruction ‘Start The Cycle’ will display on the screen. Touch ‘OK’. The next screen will display the set and actual blending RPM and Time.
4.5.20 Touch ‘Start’ on the screen. The cycle will start as per set parameters and stops automatically after set blending time. Next screen will show operation details as ‘Pre-Lubrication Cycle Finished’ and instruction ‘Unlock The Safety Railing and Insert The Trolley’.
4.5.21 Unlock the railing and adjust the trolley below the lifted blender bin. Touch ‘OK’. Instruction ‘Adjust The Trolley And Lower The Bunker’ will display on the screen.
4.5.22 Touch and hold ‘Down’ on screen. The blender bin will start lifting down. Touch ‘Up’ key to lifting up the blender bin, if required.
4.5.23 Screen will display operation details ‘Lubrication Cycle’ and instruction ‘Unlock The Safety Railing And Open The Door’ will display on the screen.
4.5.24 Unlock the safety railing. Touch ‘OK’. Instruction ‘Remove The Bunker’ will display on the screen.
4.5.25 Remove the blender bin. Touch ‘OK’. Instruction ‘Close The Safety Railing And Lock The Door’ will display on the screen.
4.5.26 Close the safety railing. Touch ‘OK’. Opening screen will appear.
4.6 Manual Mode Operation and Unloading:
4.6.1 Touch ‘Manual Mode’ on the opening screen. Manual mode main screen will appear.
4.6.2 Touch ‘OFF’ to turn ‘ON’ manual mode operational.
4.6.3 Load the Blending time and RPM as per respective BMR.
4.6.4 Open the safety railing and insert the bunker and close the safety railing.
4.6.5 Touch and hold the ‘Cage Up’. Blender bin starts lifting upward. When the blender bin will reach the middle limit switch release the cage-up key.
4.6.6 Open the safety railing and remove the trolley and again close the safety railing.
4.6.7 Touch the ‘Start’ key to start the operation.
4.6.8 Actual time and RPM will display on the screen.
4.6.9 Operation will stop after a set time.
4.6.10 Touch and hold ‘Bypass’. The blender bin will start lifting up and stop at the upper limit switch.
4.6.11 Open the safety railing and place IPC below the outlet chute of the blending bin. Open the butterfly valve and unload the bin.
4.6.12 On completion of operation open the safety railing and insert the trolley and again close the safety railing.
4.6.13 Touch ‘Cage Down’ on the screen. Blender bin will start lifting down. Touch ‘Cage Up’, if required.
4.6.14 Open the safety railing and remove the blender bin. Close the safety railing.
4.6.15 Touch ‘Main’ on the screen. An opening screen will appear.
4.7 Touch ‘Log Out’. ‘You Are Logged Out’. Turn ‘OFF’ the control key.
4.8 Take the blender bin to the ‘Granules Store’ area, if not unloaded.
4.9 Affix ‘TO BE CLEANED’ label duly filled and signed on the bin blender.
4.10 Affix ‘TO BE CLEANED’ labels duly filled and signed on blender bin if unloaded.
4.11 Record all the observations in the equipment Usage Log Sheet.
5.0 Abbreviations for Operation of Bin Blender:
BMR: Batch Manufacturing Record
IPC: In-process container
QA: Quality Assurance
SOP: Standard Operating Procedure.

Naresh Bhakar is the Founder and Author at Pharmaguddu.com, bringing his extensive expertise in the field of pharmaceuticals to readers worldwide. He has experience in Pharma manufacturing and has worked with top Pharmaceuticals. He has rich knowledge and provides valuable insights and data through his articles and content on Pharmaguddu.com. For further inquiries or collaborations, please don’t hesitate to reach out via email at [email protected].